drum roll please
Here they are: my blocks!
Oh sorry son; I meant to say, "Here they are: Will's blocks!"
These pictures aren't the best of the best and don't show off the blocks as ideally as I would have liked. However, I couldn't wait for more "professional" pics so I'm showing them to you now, as is.
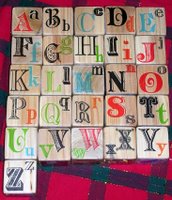 First, we have the front of all 26 blocks, each one sporting their respective letter. Don't you just love them! I found a fabulous book of transfers that worked amazingly and surprisingly well on wood. I was so thrilled with my first attempt that I have discovered a new love affair with this crappy technique! Oh, and I purchased these blocks online and was very happy with them. They are 2 inch softwood blocks, that I hand sanded to get the corners and edges rounded just right. And after using mod-podge and acrylic (which I have yet to do...), the softwood wasn't a problem. So, I highly recommend this site for all your crafting needs! Take a gander, I insist.
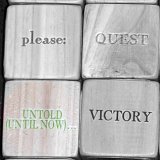
 And here we have the accompanying words. If you can't make out some of the words, go ahead and click on the pic for bigger viewing. I had so much fun picking and choosing what words or phrases I wanted to use. For example, basically for B had to be on there, because basically, that's our family word! Actually, it's Brad's word, and since I married him and Will is his offspring, it has unfortunately rubbed off on all involved...
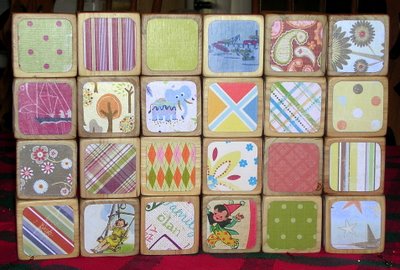
Last but certainly not least, the adorable paper that adorns these alphabet blocks! Sadly I didn't have the time, patience n'or the printer capabilities to do my original scheme/version, which was pictures sporting the letters in their prime (A as in apple, B as in bear, etc.). I did buy some clear sticker paper for that purpose, but then found the treasury of transfers and was happy enough with what I did that I decided to go a different route. That route was a trip to the scrapbook store where I purchased paper at will, thanks to my mother, and voila! I stacked them so you could see each side within the group of letters. I had to "randomly" pick letters for groups of four so that the cute paper was spread throughout the alphabet. I say randomly, but it took quite a bit of time. Also guilty of time-taking: cutting out the paper just so. I didn't have a punch, so I used a stencil sheet and then had to erase pencil lines and hand-sand each corner to rounded perfection (because scissors just don't cut it! It ends up angular and I wanted pure roundness. Nice punning by the way, eh?).
Definitely a labor of love. But for the most part, I enjoyed every minute of it! And I especially love how they turned out. You don't all have to admire them as I do, but they will be special to me and to my kids. And if Will doesn't destroy them, and they survive the rest of my children, then perhaps they will be an heirloom my progeny will enjoy.





LOVE! love love love....these are so cute! Will is so lucky to have a mom like you.
ReplyDeleteoh, and are those the Magnolia rub ons? really love the lettering. Love the whole thing, as previously noted.
ReplyDeleteI love them!! Holy cow woman! You and your blocks are truly amazing! You inspire me! Just a word of warning though: Once you put the modge podge on them, don't let your cute blocks get too hot...during our move this summer, a few picture blocks I made rippled up after being in a garage for a couple weeks.
ReplyDeleteI LOVE the blocks. YOu'll have to teach me how to do t that. You have talent and lots of patience!! We should have you do a fun craft class at the next Summers Reunion-
ReplyDeleteSeriously, you're going to have to show me how to do that. They blocks are so awesome. I love the adorable picture of Will.
Beth, this is a redundant comment, but I really like the blocks. They are very creative. It almost makes me want to be crafty....almost :).
ReplyDeleteIncredible! Have you ever thought about entering the crafty block business? I know that you would have at least one happy customer on your doorstep :)
ReplyDelete